Friday, April 12, 2019


VoIP (viết tắt của Voice over Internet Protocol, nghĩa là Truyền giọng nói trên giao thức IP) là công nghệ truyền tiếng nói của con người (thoại) qua mạng thông tin sử dụng bộ giao thứcTCP/IP. Nó sử dụng các gói dữ liệu IP (trên mạng LAN, WAN, Internet) với thông tin được truyền tải là mã hoá của âm thanh.

Công nghệ này bản chất là dựa trên chuyển mạch gói, nhằm thay thế công nghệ truyền thoại cũ dùng chuyển mạch kênh. Nó nén (ghép) nhiều kênh thoại trên một đường truyền tín hiệu, và những tín hiệu này được truyền qua mạng Internet, vì thế có thể giảm giá thành. Để thực hiện việc này, điện thoại IP, thường được tích hợp sẵn các nghi thức báo hiệu chuẩn như SIP hay H.323, kết nối tới một tổng đài IP (IP PBX) của doanh nghiệp hay của nhà cung cấp dịch vụ. Điện thoại IP có thể là điện thoại thông thường (chỉ khác là thay vì nối với mạng điện thoại qua đường dây giao tiếp RJ11 thì điện thoại IP nối trực tiếp vào mạng LAN qua cáp Ethernet, giao tiếp RJ45) hoặc phần mềm thoại (soft-phone) cài trên máy tính.


Link Download : Google Drive

Thursday, March 28, 2019

Tài liệu học MCSE :


 Link Download:  Google Drive

MCSE Server INFRASTRUCTURE 

Bài 1: Triển khai giải pháp ảo hóa máy chủ – Server Virtualization.
Bài 2: Xây dựng cơ sở hạ tầng và giải pháp lưu trữ cho hệ thống ảo hóa.
Bài 3: Triển khai máy ảo với System Center Virtual Machine Manage.
Bài 4: Xây dựng giải pháp quản lý hệ thống ảo hóa bằng System Center 2012 R2.
Bài 5: Thực hiện giám sát hệ thống bằng Sytem Center Operations Manager.
Bài 6: Triển khai khả năng sẵn sàng cao (High Availability) cho dữ liệu và ứng dụng.
Bài 7: Triển khai khả năng sẵn sàng cao cho hệ thống ảo hóa bằng công nghệ Failover Clustering.
Bài 8: Sao lưu và phục hồi dữ liệu bằng Sytem Center Data Protection Manager.
Bài 9: Triển khai Active Directory Certificate Services (AD CS).
Bài 10: Triển khai Active Directory Federation Services (AD FS).
Bài 11: Triển khai Dynamic Access Control (DAC) và Access-Denied Assistance.
Bài 12: Triển khai chức năng Work Folders.
Bài 13: Triển khai Active Directory Rights Management Services (AD RMS).

Link Dowload : Google Drive

Friday, March 15, 2019

1. Khóa Luyện Thi TOEIC cô Mai Phương :

Link Down Load : Google Drive

2. EST TOEIC Full PAR I - IV:

Link Download : Google Drive

Friday, January 11, 2019


TeamViewer : là một phần mềm tiện ích giúp cho chúng ta điều khiển kết nối giữa 1 hoặc nhiều máy khác nhau chỉ trong một click chuột nhờ tính năng điều khiển từ xa thông minh. Chủ yếu số người dùng đông đảo sử dụng nhiều nhất là các IT Supports có trên các Groups Facebook hoặc trong linh vực công nghệ thông tin, kỹ thuật viên - người thường xuyên hỗ trợ cài đặt sữa lỗi máy tính cho khách hàng...
Nếu bạn nào quan tâm đến các phiên bản cũ của TeamViewer 12 thì hãy tham khảo bài viết trước tại đây nhé. Trong đó có đề cập đến viêc nguyên nhân vì sao TeamViewer bị giới hạn 5 phút khi sử dụng phiền bạn chú ý và đọc thật kĩ. 
Các tính năng mới có trong TeamViewer 13:
  • Hỗ trợ mobile vượt trội
  • Chia sẻ màn hình iOS
  • Hỗ trợ thiết bị Motorola
  • Đại tu toàn bộ ứng dụng Android
  • Gửi và chuyển file trực quan
  • Quản lý dữ liệu quan trọng
  • Tự động phân công nhiệm vụ
  • Kết nối tới các thiết bị vừa dùng
  • Bảng điều khiển thiết bị từ xa mở rộng
  • Tăng tốc phần cứng
Download : Google Drive
 Hướng dẫn cài đặt :
Sau khi tải về giải nén :
Ấn vào file Teamviewer_Setup để cài đặt Next --> Next --->...........
Sau khi cài đặt xong ấn chuột phải vào shortcut Teamviewer ngoài Desktop chọn Open location :
Vào thư mục cài đặt của Teamviewer :
Xóa hết file Teamviewer Resource.........dll chừa lại file Teamviewer_Resource_vi.dll :
Vào lại thư mục Download lúc đầu ấn chuột phải vào file Stop_Service chọn Run adminstrator...

Tiếp theo vào thư mục Teamvier 13 Premium coppy 3 file trong đó


rồi vào lại thư mục cài đặt của teamviewer pass vào trong đó :
Vậy là xong bật Teamviewer lên và kiểm tra license :
Download : Google Drive

Friday, December 21, 2018

Mở terminal :
$sudo apt-get update 
$sudo apt-get install xrdp mate-core mate-desktop-environment mate-notification-daemon -y
$sudo sed -i.bak '/fi/a #xrdp multiple users configuration \n mate-session \n' /etc/xrdp/startwm.sh
$ufw allow 3389/tcp

Thursday, December 20, 2018

Mở Terminal :

dong@dong-ict:~$ xinput
⎡ Virtual core pointer                     id=2 [master pointer  (3)]
⎜   ↳ Virtual core XTEST pointer               id=4 [slave  pointer  (2)]
⎜   ↳ Logitech USB Optical Mouse               id=11 [slave  pointer  (2)]
⎜   ↳ Synaptics s3203                          id=13 [slave  pointer  (2)]
⎣ Virtual core keyboard                    id=3 [master keyboard (2)]
    ↳ Virtual core XTEST keyboard              id=5 [slave  keyboard (3)]
    ↳ Power Button                             id=6 [slave  keyboard (3)]
    ↳ Video Bus                                id=7 [slave  keyboard (3)]
    ↳ Video Bus                                id=8 [slave  keyboard (3)]
    ↳ Power Button                             id=9 [slave  keyboard (3)]
    ↳ Sleep Button                             id=10 [slave  keyboard (3)]
    ↳ Integrated_Webcam_HD: Integrate          id=12 [slave  keyboard (3)]
    ↳ Dell WMI hotkeys                         id=14 [slave  keyboard (3)]
    ↳ AT Translated Set 2 keyboard             id=15 [slave  keyboard (3)]
dong@dong-ict:~$ xinput disable 13

Tuesday, December 18, 2018

Installation

This flash method applies to EON, INTEL, and SAMSUNG(?) flash chips.
NOTE TO WINDOWS USERS: The native TFTP Client is disabled by default, so enable it before proceeding (or download a third party TFTP tool, ex: TFTP2 or TFTP32/TFTP64). In Windows, go to "Add or Remove Programs" (or "Programs and Features", depending on the Windows version) from the Start menu or Control Panel, then the Windows Features section, and scroll down to select TFTP Client to enable it.
  1. First download vxworkskillerGSv7-v3.bin and dd-wrt.v24_micro_generic.bin
  2. Set a static IP address (outside DHCP range e.g. 192.168.1.10), connect the PC ethernet to a router LAN port
    • Linux command: ifconfig eth0 192.168.1.10
    • Windows™: go to Control Panel->Network and Internet->Network Connections
      1. Right-click, go to the LAN device properties, then find and open the TCP/IPv4 Properties
      2. Select "Use the following IP address" to set a static IP (e.g. 192.168.1.10, subnet 255.255.255.0)
        • Ensure this static IP is outside the DHCP range
  3. Unplug the router, then hold the reset button while reconnecting power for about 20 seconds.
  4. Open your browser to http://192.168.1.1/
  5. Use the Firmware upgrade option under the Administration tab to flash vxworkskillerGSv7-v3.bin.
  6. After the dialogue about disconnecting the power cord is shown, disconnect the power cord and reconnect it.
  7. Wait for FIVE FULL minutes, then disconnect the power cord for 10sec and reconnect it.
  8. Transfer the firmware using TFTP
    • Linux command: tftp -v -m octet 192.168.1.1 -c put dd-wrt.v24-micro_generic.bin
    • Windows™ Command Prompt (cmd): tftp -i 192.168.1.1 put dd-wrt.v24_micro_generic.bin
  9. Wait for tftp to finish, then the router will automatically reboot. Finally, access the GUI at 192.168.1.1
  10. Watch the router lights: the power light will eventually come on, followed by the WLAN light
    • Note: If the router does not boot automatically, even after a power cycle, reset again, per step 3.

[edit] Alternate method to flash WRT54GSv7.2

There is no resetting in the middle of this process. This method has also been used on WRT54Gv8 (not GS), and should work on the v7.0. My WRT54GSv7.2 has an EON EN29LB160AB-70TCP flash chip and 16MB Samsung RAM.
tiger12506 has successfully performed this on two WRT54GS v7.2 with CGNE serial numbers. He felt that he had bricked one of the routers at first. Messing around with JTAG cables taught him some things, but be absolutely sure that you have tftp set to binary or octel. If you leave tftp in ascii it will appear to work but the flash won't take.
1. Use the web interface to reset the router to factory defaults.
2. Manually set a static IP (e.g. 192.168.1.10 or any address outside the DHCP range)
  • Linux: sudo ifconfig eth0 192.168.1.10
3. Use the web inferface to update the firmware to vxworkskillerGSv7-v3.bin.
4. Windows: tftp -i 192.168.1.1 PUT dd-wrt.v24_micro_generic.bin
  • Linux: enter tftp mode with # tftp 192.168.1.1
 tftp> mode binary
 tftp> put dd-wrt.v24_micro_generic.bin
 tftp> quit
5. Start a continuous ping: ping -t 192.168.1.1 (-t is Windows only) This will time out repeatedly, then the router will respond about two and six times, time out again a few times, and then start responding to pings.
  • [This is where tiger12506 had trouble, but after a long reset, and some short resets, more and more lights came on until finally the WLAN light came on and the router functioned normally running DD-WRT]
6. Access the DD-WRT GUI at 192.168.1.1

Wednesday, December 5, 2018

1. Cấu hình các interface cho router .
Cấu hình R1 :

R1#conf t
R1(config)#int lo1
R1(config-if)#ip add 192.168.1.1 255.255.255.252
R1(config-if)#int l02
R1(config-if)#ip add 192.168.1.3 255.255.255.252
Bad mask /30 for address 192.168.1.3
R1(config-if)#ip add 192.168.2.1 255.255.255.252
R1(config-if)#int lo3
R1(config-if)#ip add 192.168.3.1 255.255.255.252
R1(config-if)#int lo4
R1(config-if)#ip add 192.168.4.1 255.255.255.252
R1(config-if)#int s2/0
R1(config-if)#no sh
R1(config-if)#ip add 1.1.1.1 255.255.255.248
R1(config-if)#int s2/1
R1(config-if)#no sh
R1(config-if)#ip add 2.2.2.2 255.255.255.248
Cấu hình trên R2 :
R2#conf t
R2(config)#int s2/0
R2(config-if)#no sh
R2(config-if)#ip add 1.1.1.2 255.255.255.248
R2(config-if)#int s2/1
R2(config-if)#no sh
R2(config-if)#ip add 3.3.3.2 255.255.255.248
Cấu hình trên R3 :
R3#conf t
R3(config)#int s2/0
R3(config-if)#no sh
R3(config-if)#ip add 3.3.3.1 255.255.255.248
R3(config-if)#
R3(config-if)#int s2/1
R3(config-if)#no sh
R3(config-if)#ip add 2.2.2.1 255.255.255.248 

R3(config-if)#int lo1
R3(config-if)#ip add 172.16.1.1 255.255.255.252
R3(config-if)#int lo2
R3(config-if)#ip add 172.16.2.1 255.255.255.252
R3(config-if)#int lo3
R3(config-if)#ip add 172.16.3.1 255.255.255.252
R3(config-if)#int lo4
R3(config-if)#ip add 172.16.4.1 255.255.255.252

2. Cấu hình và kiểm tra Route EIGRP:
- Cấu hình EIGRP
 
R1(config-if)#do show run | begin eigrp
router eigrp 10
 network 1.1.1.1 0.0.0.0
 network 2.2.2.2 0.0.0.0
 network 192.168.1.1 0.0.0.0
 network 192.168.2.1 0.0.0.0
 network 192.168.3.1 0.0.0.0
 network 192.168.4.1 0.0.0.0


R2(config-if)#do show run | begin eigrp
router eigrp 10
 network 1.1.1.2 0.0.0.0
 network 3.3.3.2 0.0.0.0


R3(config-router)#do show run | begin eigrp
router eigrp 10
 network 2.2.2.1 0.0.0.0
 network 3.3.3.1 0.0.0.0
 network 172.16.1.1 0.0.0.0
 network 172.16.2.1 0.0.0.0
 network 172.16.3.1 0.0.0.0
 network 172.16.4.1 0.0.0.0
!

- Kiểm tra EIGRP câu lệnh : Show ip eigrp neighbor và show ip route eigrp.

R1#show ip eigrp neighbor
EIGRP-IPv4 Neighbors for AS(10)
H   Address                 Interface              Hold Uptime   SRTT   RTO  Q  Seq
                                                   (sec)         (ms)       Cnt Num
1   2.2.2.1                 Se2/1                    11 00:10:07   15   100  0  14
0   1.1.1.2                 Se2/0                    13 00:15:53   13   100  0  31


R2#show ip eigrp neighbor
EIGRP-IPv4 Neighbors for AS(10)
H   Address                 Interface              Hold Uptime   SRTT   RTO  Q  Seq
                                                   (sec)         (ms)       Cnt Num
1   3.3.3.1                 Se2/1                    13 00:09:43   12   100  0  15
0   1.1.1.1                 Se2/0                    14 00:14:57   11   100  0  29

R3#show ip eigrp neighbor                                                   
EIGRP-IPv4 Neighbors for AS(10)
H   Address                 Interface              Hold Uptime   SRTT   RTO  Q  Seq
                                                   (sec)         (ms)       Cnt Num
1   2.2.2.2                 Se2/0                    12 00:11:11   11   100  0  30
0   3.3.3.2                 Se2/1                    12 00:11:43  430  2580  0  32

3. Cấu hình Summarization :
- Để cấu hình Auto Summarization ta vào EIGR và gõ câu lệnh :
R1(config-if)#router eigrp 10
R1(config-router)#auto-summary 

R2(config)#router eigrp 10
R2(config-router)#auto-summary

R3(config)#router eigrp 10
R3(config-router)#auto-summary
Sau khi cấu hình autosum kiểm tra lại route EIGRP
R1#show ip route eigrp

Gateway of last resort is not set

      1.0.0.0/8 is variably subnetted, 3 subnets, 3 masks
D        1.0.0.0/8 is a summary, 00:04:43, Null0
      2.0.0.0/8 is variably subnetted, 3 subnets, 3 masks
D        2.0.0.0/8 is a summary, 00:04:27, Null0
D     3.0.0.0/8 [90/2681856] via 2.2.2.1, 00:04:27, Serial2/1
                [90/2681856] via 1.1.1.2, 00:04:27, Serial2/0
D     172.16.0.0/16 [90/2297856] via 2.2.2.1, 00:04:27, Serial2/1
      192.168.1.0/24 is variably subnetted, 3 subnets, 3 masks
D        192.168.1.0/24 is a summary, 00:04:56, Null0
      192.168.2.0/24 is variably subnetted, 3 subnets, 3 masks
D        192.168.2.0/24 is a summary, 00:04:57, Null0
      192.168.3.0/24 is variably subnetted, 3 subnets, 3 masks
D        192.168.3.0/24 is a summary, 00:04:57, Null0
      192.168.4.0/24 is variably subnetted, 3 subnets, 3 masks
D        192.168.4.0/24 is a summary, 00:04:56, Null0

Tuesday, December 4, 2018


Cấu hình trên R1 : Đặt IP cho các cổng.
R1#conf t
R1(config)#int e0/0
R1(config-if)#no sh
R1(config-if)#ip add 192.168.1.1 255.255.255.0
R1(config-if)#int e0/1
R1(config-if)#no sh
R1(config-if)#ip add 192.168.2.1 255.255.255.0
R1(config-if)#int lo1  
R1(config-if)#ip add 1.1.1.1 255.255.255.255
Xem IP các cổng đã cấu hình :
R1(config-router)#do show ip int bri | inc up
Ethernet0/0                192.168.1.1     YES manual up                    up      
Ethernet0/1                192.168.2.1     YES manual up                    up      
Loopback1                  1.1.1.1         YES manual up                    up      
1. Cấu hình EIGRP vs AS = 10 !
Trên R1 :
R1(config-if)#router eigrp 10
R1(config-router)#net 1.1.1.1 0.0.0.0
R1(config-router)#net 192.168.1.1 0.0.0.0
R1(config-router)#net 192.168.2.1 0.0.0.0
Trên R2 :
R2#conf t
R2(config)#int e0/0
R2(config-if)#no sh
R2(config-if)#ip add 192.168.1.2 255.255.255.0
R2(config-if)#int e0/1
R2(config-if)#no sh
R2(config-if)#ip add 192.168.3.2 255.255.255.0
R2(config-router)#net 192.168.3.2 0.0.0.0
R2(config-router)#net 192.168.1.2 0.0.0.0
Trên R3 :
R3#conf t
Enter configuration commands, one per line.  End with CNTL/Z.
R3(config)#int e0/1
R3(config-if)#no sh
R3(config-if)#ip add 192.168.2.2 255.255.255.0
R3(config-if)#int e0/0
R3(config-if)#no sh
R3(config-if)#ip add 192.168.4.2 255.255.255.0
R3(config-if)#router eigrp 10
R3(config-router)#net 192.168.2.2 0.0.0.0
R3(config-router)#net 192.168.4.2 0.0.0.0
Trên R4 :
R4#conf t
R4(config)#int e0/1
R4(config-if)#no sh
R4(config-if)#ip add 192.168.4.1 255.255.255.0
R4(config-if)#int e0/0
R4(config-if)#no sh
R4(config-if)#ip add 192.168.3.1 255.255.255.0
R4(config)#router eigrp 10  
R4(config-router)#net 192.168.3.1 0.0.0.0
R4(config-router)#net 192.168.4.1 0.0.0.0
R4(config-router)#net 4.4.4.4 0.0.0.0
R4(config-router)#int l01
R4(config-if)#ip add 4.4.4.4 255.255.255.255 
Kiểm tra AS :
R4(config-router)#do show ip protocol

*** IP Routing is NSF aware ***

Routing Protocol is "eigrp 10"
  Outgoing update filter list for all interfaces is not set
  Incoming update filter list for all interfaces is not set
  Default networks flagged in outgoing updates
  Default networks accepted from incoming updates
  EIGRP-IPv4 Protocol for AS(10)
    Metric weight K1=1, K2=0, K3=1, K4=0, K5=0
    NSF-aware route hold timer is 240
    Router-ID: 192.168.4.1
...............................................
2. Cấu hình trên tất cả các Router chỉ tính metric bằng Delay:
Như chúng ta đã biết công thức tính metric của EIGRP là :
Để cho các Router chỉ tính metric bằng Delay thì k1,k2,k4,k5 = 0.
Mặc định : Metric weight K1=1, K2=0, K3=1, K4=0, K5=0
Cho nên chúng ta chỉ cần cấu hình K1 = 0 là thỏa mãn yêu cầu bài lab.

 - Cấu hình K1 = 0 trên cả 3 Router :
R1(config-if)#router eigrp 10
R1(config-router)#metric weights ?
  <0-8>  Type (Only TOS 0 supported)
R1(config-router)#metric weights 0 0 0 1 0 0
=========================================== 
R2(config-router)#router eigrp 10
R2(config-router)#metric weights 0 0 0 1 0 0
=========================================== 
R3(config-router)#router eigrp 10
R3(config-router)#metric weights 0 0 0 1 0 0
=========================================== 
R4(config)#router eigrp 10
R4(config-router)#metric weights 0 0 0 1 0 0

3. Cấu hình cân bằng tải trên R1!


R1(config)#router eigrp 10
R1(config-router)#vari
R1(config-router)#variance ?
  <1-128>  Metric variance multiplier
      
R1(config-router)#variance 2
Để traffice đi qua R3 gấp đôi R2 thì đường đi qua R3 phải tốt gấp đôi R2, mà metric chỉ dựa vào Delay nên ta chỉ cần cấu hình chỉnh giá trị Delay trên interface e0/0 của R1 :

R1(config-if)#int e0/0
R1(config-if)#delay ?  
  <1-16777215>  Throughput delay (tens of microseconds) 
R1(config-if)#delay 800 
R1(config-if)#end
R1#show int e0/0 

Ethernet0/0 is up, line protocol is up
  Hardware is AmdP2, address is aabb.cc00.0100 (bia aabb.cc00.0100)
  Internet address is 192.168.1.1/24
  MTU 1500 bytes, BW 10000 Kbit/sec, DLY 8000 usec,
     reliability 255/255, txload 1/255, rxload 1/255
  ..........................................
 4. Kiểm tra :
R1#show ip route 4.4.4.4

Routing entry for 4.4.4.4/32
  Known via "eigrp 10", distance 90, metric 179200, type internal
  Redistributing via eigrp 10
  Last update from 192.168.1.2 on Ethernet0/0, 00:00:36 ago
  Routing Descriptor Blocks:
  * 192.168.2.2, from 192.168.2.2, 00:00:36 ago, via Ethernet0/1
      Route metric is 179200, traffic share count is 2
      Total delay is 7000 microseconds, minimum bandwidth is 10000 Kbit
      Reliability 255/255, minimum MTU 1500 bytes
      Loading 1/255, Hops 2
    192.168.1.2, from 192.168.1.2, 00:00:36 ago, via Ethernet0/0
      Route metric is 358400, traffic share count is 1
      Total delay is 14000 microseconds, minimum bandwidth is 10000 Kbit
      Reliability 255/255, minimum MTU 1500 bytes
      Loading 1/255, Hops 2

Download Lab : Google Drive 

Tài liệu học CCNP Full


Mở Terminal bằng phím : Ctrl + Alt + T :

sudo add-apt-repository ppa:gns3/ppa
sudo apt-get update
sudo apt-get install gns3-gui 
Nếu bạn muốn cài IOU :
sudo dpkg --add-architecture i386
sudo apt-get update
sudo apt-get install gns3-iou

Để mở GNS3 :

1. Tải VMware Workstation :
Mở command line bằng phím tắt Ctr + Alt +  T :

$ wget -O ~/vmware.bin https://www.vmware.com/go/getworkstation-linux 
2.Cài đặt điều kiện để cài đặt VMware :

$ sudo apt install build-essential
3. Cài đặt VMware:

sudo bash ~/vmware.bin
List key VMware 15 cho ai cần nhé :
  1. ZG75A-4DY8K-489TQ-YQNZV-Y2UWA
  2. CY7JA-2LZE4-480CQ-TDM7V-ZK8DF
  3. YA75U-89XE4-08EQY-45WNT-NC890
  4. YV5XR-0AG93-H845Q-DDZQC-M2KWF
  5. AA1JR-0TX86-4847Y-JDQGV-YQKF8
  6. ZA35K-FHX4Q-0848P-MGW5G-N28FD
  7. YZ192-86X1N-H884Q-GWXEC-N7HV0
  8. FZ5XU-40X0H-48EXP-DPYGT-MZKYA
  9. YY3T0-42DEN-H88MZ-RDPEG-Y6RR0
  10. AU75H-2EWE2-M85QQ-JXXNZ-MCHA4
  11. FG3N0-FFD0P-0895Z-64P7C-XQRA2
  12. GG1D8-4QXE1-481NY-C6XQX-Y3U9D
  13. FU58K-2YX9J-M8ETZ-DWNEG-X7KAA
  14. FF788-A1X86-08E9Q-5YN79-XV0YD
  15. FC51U-43Z0L-H85TZ-NZQ5G-PZUW6
Mở VMware :
 

Thursday, November 29, 2018


Link tải file cài đặt ISO : Google Drive

Hướng dẫn cấu hình : Google Drive

Saturday, November 24, 2018

Trong bài này mình sẽ hướng dẫn cài đặt Pidgin cho Ubuntu 18.04

Cài đặt Pidgin 2.13.0 qua PPA trong Ubuntu 18.04:

Mở terminal bằng phím Ctrl+Alt+T hoặc gõ ‘terminal’ trong Softwave center
gõ câu lệnh này để thêm PPA:
sudo add-apt-repository ppa:kip/pidgin Type your user password (no asterisks feedback) when it prompts and hit Enter.

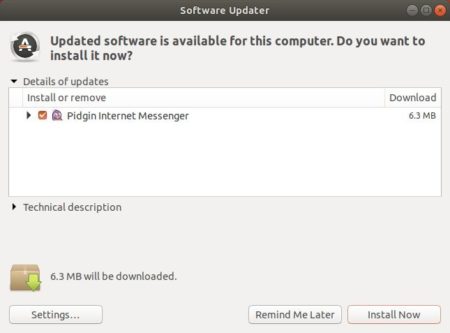
Then you can upgrade the internet messenger via Software Updater:

or run command in terminal to install Pidgin 2.13.0:
sudo apt-get install pidgin

Uninstall:

For any reason you can easily purge the PPA which also downgrade Pidgin to the stock version in Ubuntu 18.04 repository:
sudo apt-get install ppa-purge && sudo ppa-purge ppa:kip/pidgin

Tích hợp facebook lên Pidgin :

wget http://downloadcontent.opensuse.org/repositories/home:/jgeboski/xUbuntu_18.04/amd64/purple-facebook_20180323~ef6ae47~9ff9acf9fa14~145_amd64.deb 
Sau khi download xong vao thư mục Download gõ lệnh:
sudo dpkg -i purple-facebook_*.deb
để cài đặt gõ lệnh :
sudo apt install -f
restart lại Pidgin sẽ có plugin facebook nhé :)


Xem nhiều nhất